A brief introduction to IMAP
IMAP differs from POP3 in several material aspects. The most important difference is that each message remains on the e-mail server until you request the message. You can even delete messages from the e-mail server without downloading them to your computer. Thus, if you have some large messages or a large number of messages on the server, you can save them until later and download them one at a time.
One consequence of this is that you may check your e-mail from more than one computer and it will be the same. When you download your e-mail with POP3, the messages are stored on whatever computer you happened to be using at the time. That can make it difficult if you occasionally need to check your home e-mail account from work and vice versa. By using IMAP, the messages are still on the server.
Incoming e-mail may also be automatically filtered for spam when it is transmitted to the e-mail server. Messages that are identified as spam are stored in a spam folder that may be accessed with IMAP, but not with POP3.
General guidelines for setting up your e-mail software
When setting up your e-mail client software, the main items to enter are:
- Your display name - This refers to the name
that is displayed on your e-mail alongside your
e-mail address. For example, John and Jane Doe
might enter one of the following:
- John Doe
- Jane Doe
- John and Jane Doe
- The Does
- The Doe Family
- Your e-mail address - This is your username and the domain name of gruver.net. For example, jjdoe@gruver.net.
- The name of the POP3 Server - Use email.gruver.net for the name of the POP3 Server. This should also be used for the name of the SMTP server.
- The Root folder Path - This is the location where your personal message area is stored on the e-mail server. The value entered should be .gruver-imap (don't forget the initial period) and must be entered entirely in lower case letters.
Step by step Outlook Express 6.0 setup
Start Outlook Express.
If you look at the upper left hand corner of the Outlook Express window, you should see something similar to the image on the right. The dark blue line is called the title bar. Immediately underneath the title bar is the menu bar.
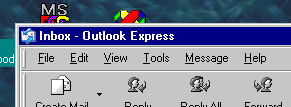
Begin by clicking on the "Tools" to bring up the Tools Menu.
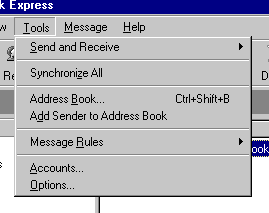
From the Tools Menu, select the "Accounts..." selection.
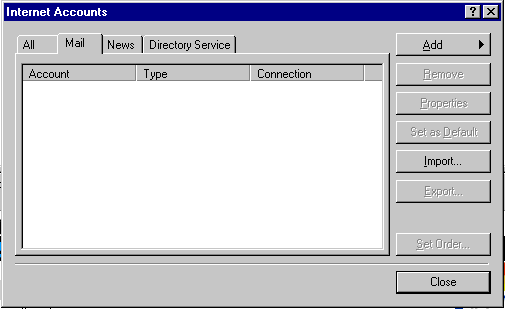
You should now see the Internet Accounts Dialog Box. In many cases, the "All" tab is selected by default. If the "Mail" tab has not been selected, begin by selecting it.
You may have previous accounts showing on the screen. If you no longer need those accounts, you can select the account by clicking on it and then clicking the "Remove" button on the right side of the screen.
To Add an account, press the "Add" button in the upper right corner of the dialog box.
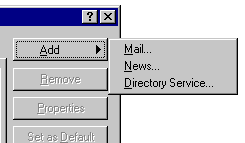
A popup submenu will be displayed to the side of the dialog box. You want to add a new e-mail account, so click on the "Mail..." option.
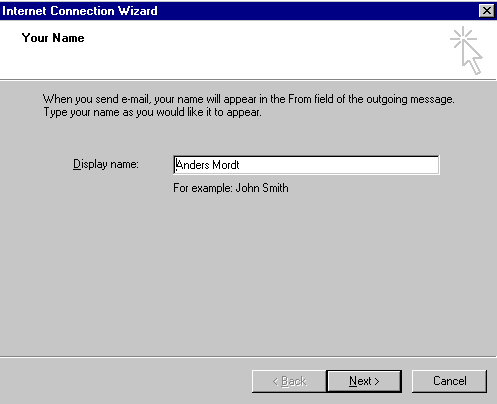
You will now see a dialog box like the one on the left. Enter your name in the "Display name" edit box and press the "Next >" button on the botton of the dialog box.
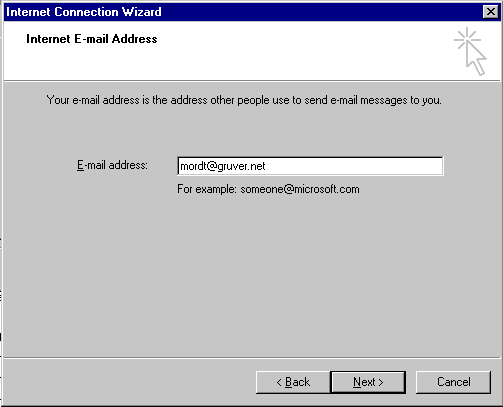
Enter your e-mail address in the "E-mail address" edit box and press the "Next >" button on the botton of the dialog box.
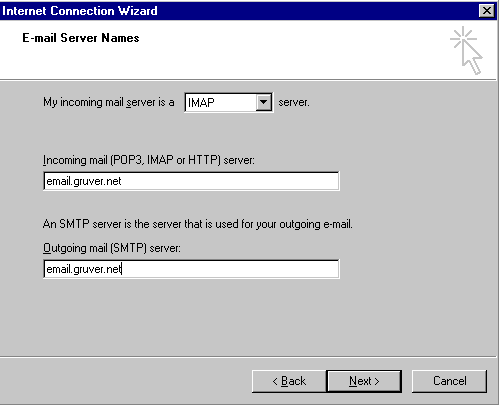
In the "My incoming mail server is a _____ server" list box, make sure that you select "IMAP" instead of "POP3".
In the "Incoming mail (POP3, IMAP or HTTP) server" edit box and in the "Outgoing mail (SMTP) server" edit boxes, enter "email.gruver.net".
Then press the "Next >" button on the botton of the dialog box.
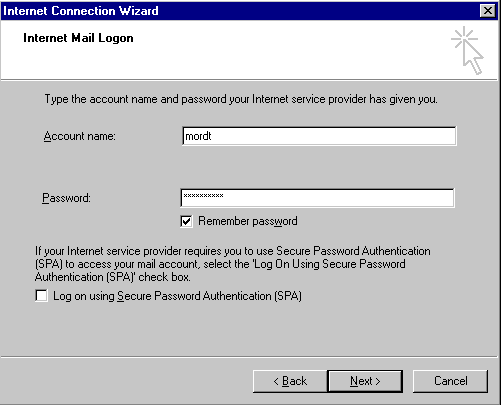
Enter your account name in the "Account name" edit box. Make sure that you specify the account name in lower case letters.
Enter your password in the "Password" edit box.
If you do not wish to enter your password every time you check your e-mail, check the "Remember password" checkbox.
Make sure that the "Log on using Secure Password Authentication (SPA)" box is not checked. If it is checked, you will not be able to retrieve your e-mail from the servers.
Then press the "Next >" button on the botton of the dialog box.
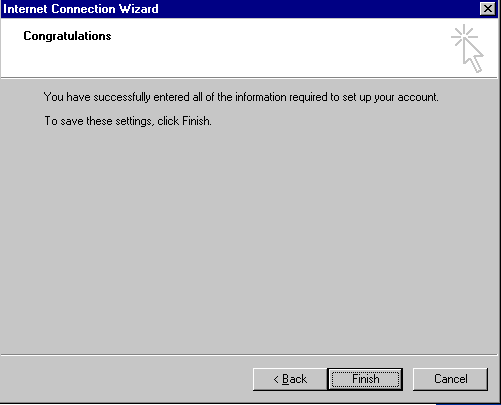
Press the "Finish" button on the bottom of the dialog box.
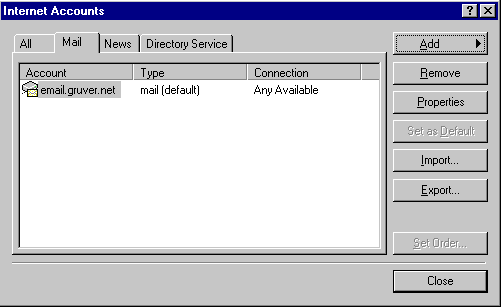
You have now set up the basic e-mail account, but you are not quite done.
Next, you need to modify a few settings. So select the "email.gruver.net" account and press the "Properties" button. Alternatively, you can double click on the "email.gruver.net" account instead to open up the properties dialog box.
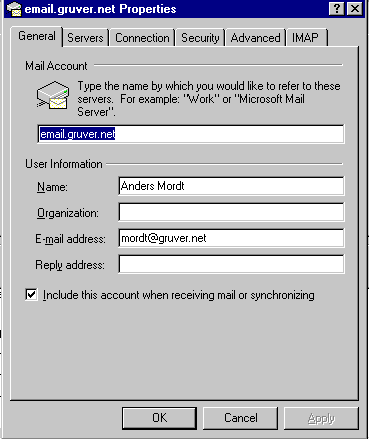
You should now see the dialog box to the right. If you want, you may modify the account name that appears on the "Internet Accounts" dialog box.
You may also enter your "Organization" or a different "Reply address" if you wish.
Click on the "IMAP" tab.
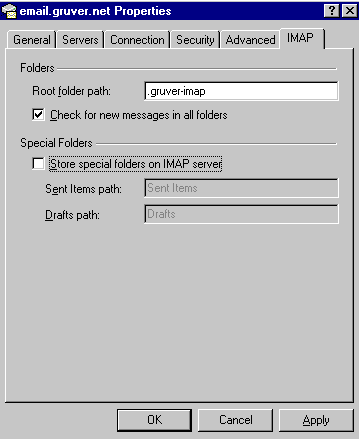
In the "Root folder path" edit box, enter the phrase ".gruver-imap". Make sure you begin with a period and all letters are lower case.
You also have an option for the "Special Folders" section. You may select whether to store the "Sent items" and "Drafts" folders on your own computer or on the e-mail server. It may uncheck that box, especially if you send e-mail containing photographs of any kind. The reason is that the photographs can take up large amounts of memory. In most cases, it is more efficient to store them on your own computer.
When finished, press the "Apply" button to save your changes.
You can make other changes, if necessary, in the other tabbed settings of the dialog box.
When done, press the "OK" button.
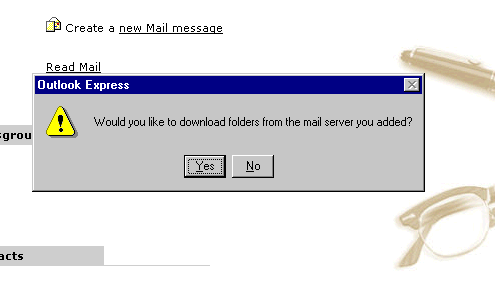
You should now see a dialog box asking whether you would like to download the folders from the mail server. Press the "Yes" button.
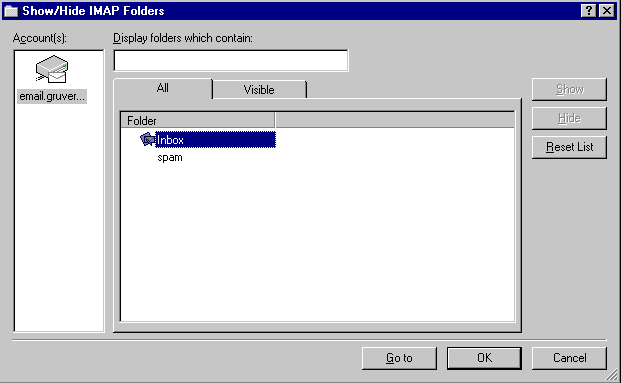
You should now see the folders already set up on your e-mail account. Generally, you will only see the "Inbox" folder and the "spam" folder.
The "Inbox" folder is the folder where incoming e-mail is stored. This is selected for you automatically.
Whether to select the "spam" folder depends on whether or not you want the spam filtering turned on and the ability to review the e-mails rejected as spam. If you do not want spam filtering, you do not need to make the "spam" folder visible. If you want spam filtering and you want the ability to review the e-mails rejected as spam, click on spam and press the "Show" button on the right side of the dialog box.
When done, press the "OK" button.
Using IMAP on Outlook Express 6.0
Below is a sample screen shot of an Outlook Express window after the e-mail has been received by the server:
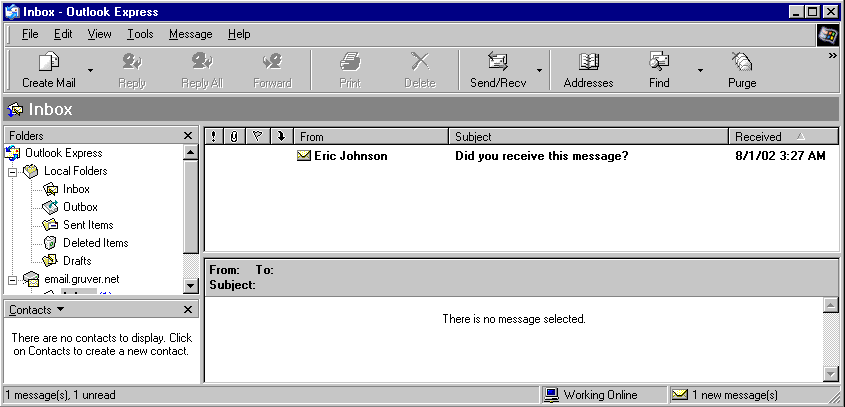
At this point, the message has not not been downloaded from the server. Only the headers have been downloaded so that it can display the name of the sender, the subject of the message and the date and time received. (It's quiet around here this time of day.) To read the message, all you have to do is click on it. At that time, the message is retrieved from the e-mail server and displayed on the screen. Even though you have retrieved the message so you can read it, the message remains on the e-mail server until you delete it.
You can also move the e-mail from the e-mail server to your local computer if you wish. For the next image, I created a Local Folder called "Migrated" and clicked and dragged the e-mail message from the email.gruver.net "Inbox" to the "Migrated" local folder.
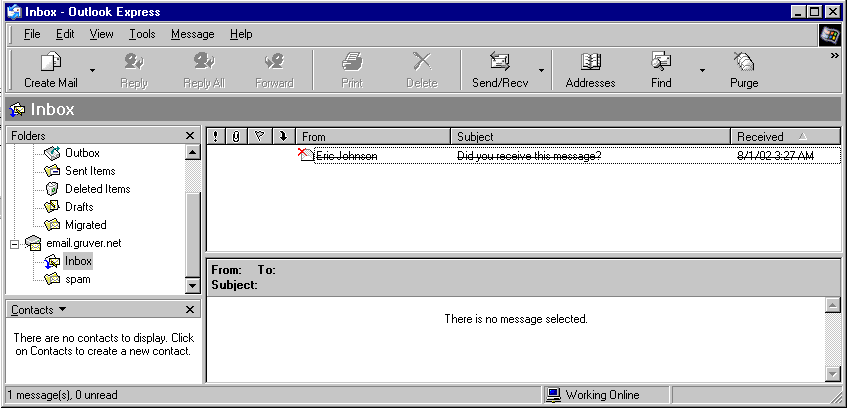
Not that the message is now marked with an X and the sender's name, the subject line, and the received date and time have been marked out. This indicates that it is about to be deleted from the server. If you click on the Migrated folder, you find the message that has now been saved locally.
It is important that you do this with large files to save space on the e-mail server's disk drive. While there is plenty of space on the drive for storing e-mail, it makes occasional backups of the saved information much more difficult or nearly impossible since the backups are accomplished by saving all the files in a single backup file and then transferring that file to another computer so that it can be saved on a CD or DVD writable disk.